Attention: If you are new to our products or have any questions, please contact our support team. Our specialists will assist you promptly and provide clear, professional guidance. Below you will find videos with solutions to the most frequently asked questions about Raufilter products.
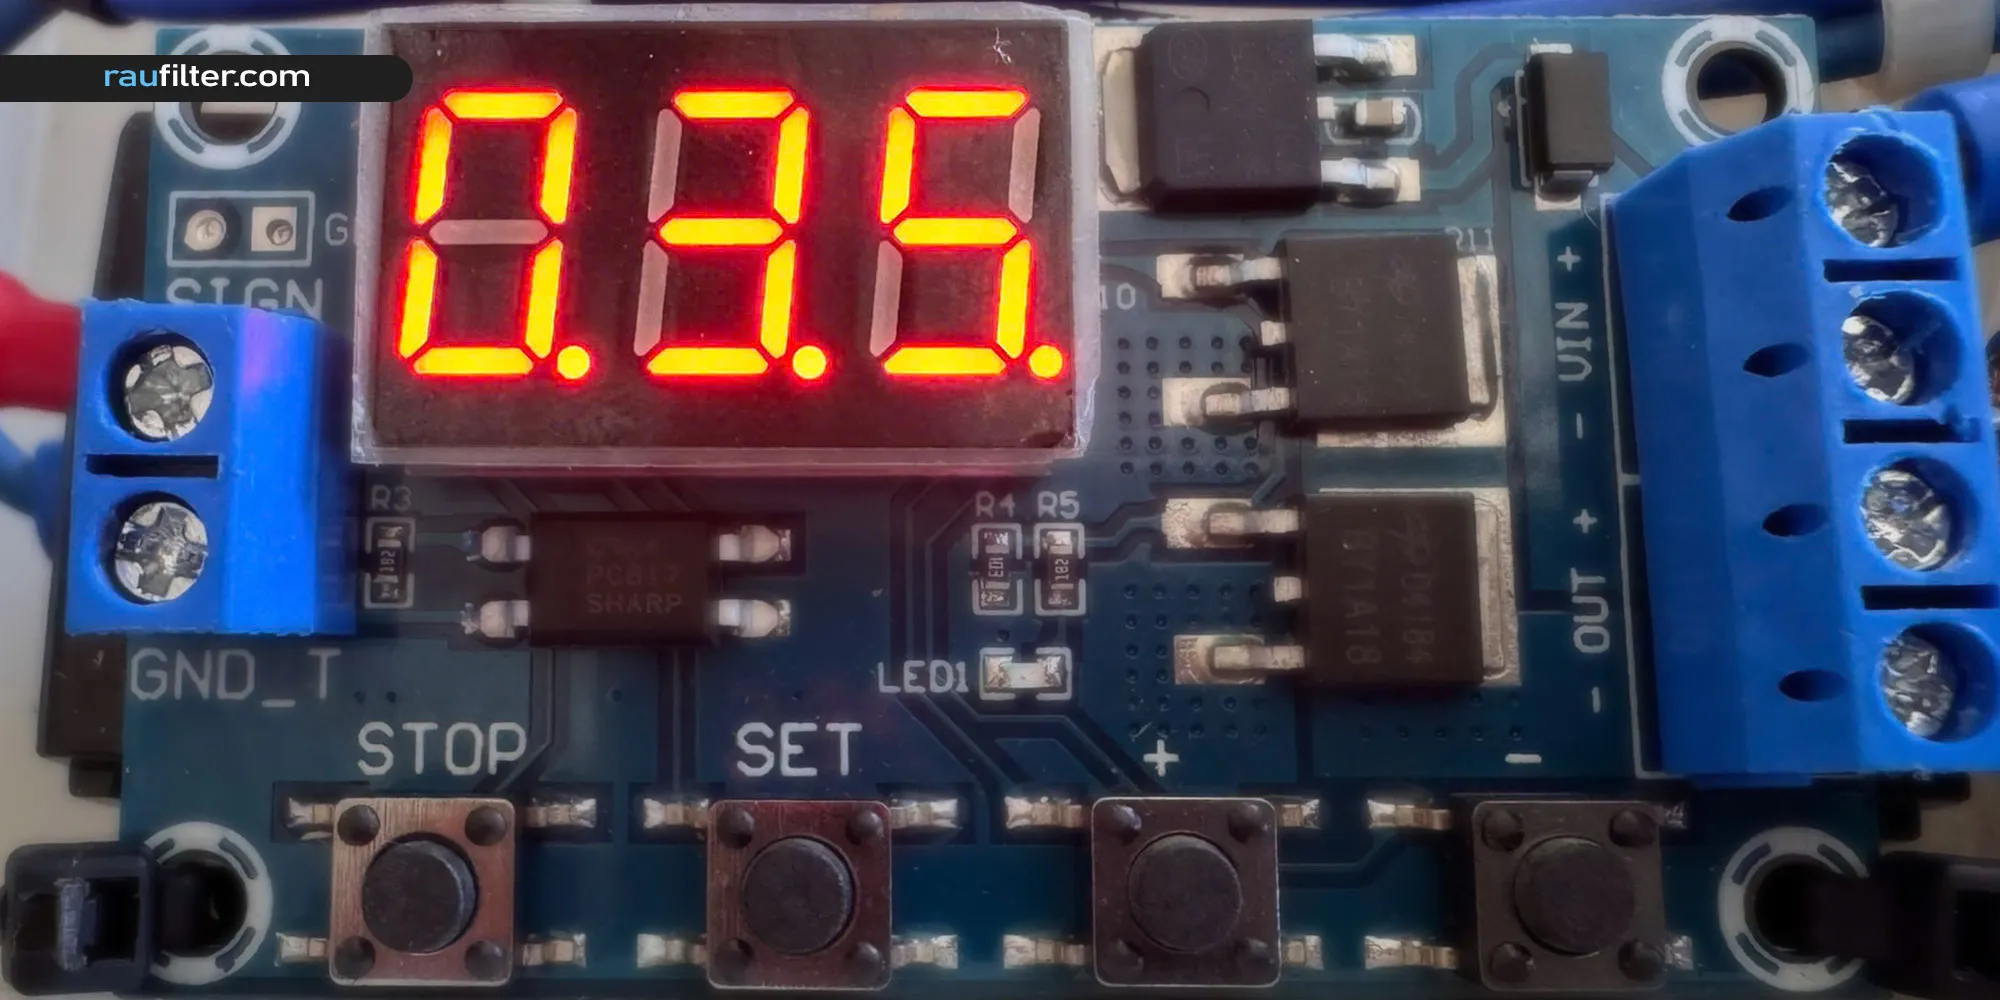
The timer controls the automatic switching of the drum filter on and off, allowing you to optimize its operation according to your system requirements. You can independently adjust:
Filter operating time (the duration the filter is running) Waiting time (the interval between operating cycles)
To ensure efficient performance, set the operating and waiting times based on water conditions, загрязнение level, and system load. Regularly check and adjust the timer settings if necessary to maintain optimal filtration performance.
Connect the timer to the control box of the RAUfilter drum filter according to the wiring diagram provided with the equipment. Ensure that all connections are properly secured and comply with electrical safety requirements.
Before connecting, make sure the power supply is switched off to avoid damage or injury. After installation, verify that the timer operates correctly and controls the filter as intended. If you have any questions or require assistance, please contact our technical consultant.
In this video, the pump is connected directly to the Model 30 filter. However, the pump can also draw water from other sources, such as a biofilter, settling tank, or main water supply system. When connecting the pump, ensure that all hoses and fittings are properly secured and free of leaks. Verify that the selected water source provides adequate flow and is compatible with the filter system. After installation, check the pump operation to ensure stable water supply and proper filter performance. If you have any questions or require assistance, please contact our technical consultant.
Checking the float
⚠️ WARNING!!! It is very important to follow the instructions exactly. You need to check whether the float switch is working properly. To do this: Connect terminals #4 and #5 for one second only.
❗ This is extremely important — do NOT mix them up. Other terminals may carry 110–220 volts, so connecting the wrong ones can be dangerous. After briefly connecting terminals #4 and #5: If the system starts working but the float switch does not activate, this means the float switch is damaged.
➤ The float switch must be replaced. If the system does not start, this means the control unit is damaged.
Electrical Connection and Insulation Connect the wires exactly as shown in the video, following the correct wiring configuration. After making the connections, ensure all exposed wire sections are properly insulated. Use heat shrink tubing or high-quality electrical tape to provide reliable protection. After completing the insulation, check that all connections are firm and properly protected before powering on the system.
Sludge Pipe Connection This is a recommended installation method. It is advised to install the sludge pipe at an angle to allow water and waste to flow freely and help prevent blockages. Do not glue the pipe connection. This allows for easy removal during maintenance, cleaning, or servicing of the system. Ensure the pipe is securely positioned to prevent leaks while still allowing convenient disassembly when required.
Disassembling the filter
Disassembling the filter RAUfilter (5, 10, 20, 30)
Filter Disassembly and Handling The video demonstrates the drum filter Model 30; however, the same procedure applies to RAUfilter models 5, 10, 20, and 30. Please follow the disassembly and assembly process exactly as shown in the video. Do not apply excessive force or use harsh actions during disassembly or reassembly, as this may damage the components. Handle all parts of the filter with care. Proper handling and maintenance will ensure reliable operation and extend the service life of the equipment for many years.
Mesh Installing
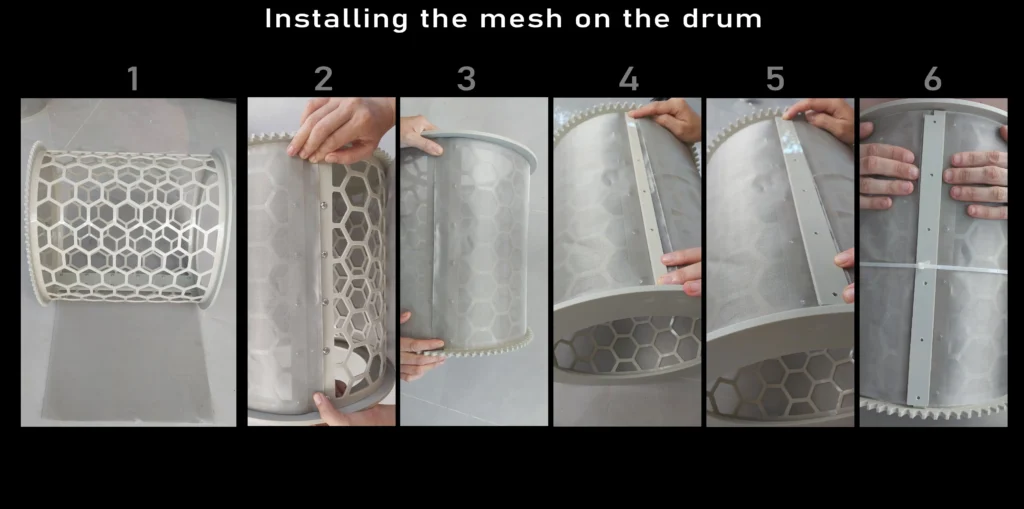
Installing a mesh on a drum filter
Mesh Installation and Fixing The mesh can be temporarily secured using zip ties or adhesive tape to hold it in position during installation. Fix the mesh in several places to ensure an even and tight fit across the surface, avoiding wrinkles or slack areas.
Once the mesh is properly aligned and secured, carefully pierce it using an awl or a small screwdriver at the required fastening points. When piercing the mesh, hold the area firmly with your fingers to prevent it from shifting and to ensure the hole is neat and properly positioned. Then attach it firmly using bolts.
Ensure all fasteners are tightened securely and the mesh is evenly tensioned to maintain proper filtration performance.
Important! Do not fully tighten the nuts from the beginning. Install all bolts with nuts in place first, then proceed as follows: Tighten all nuts evenly, turning each one by only one rotation per pass. The mesh will gradually stretch and settle as the nuts are tightened. The mesh should be tensioned to medium tightness — taut enough to be smooth, but not overstretched.
Remember: The mesh is made of stainless steel, while the drum is plastic. Over-tightening can damage the drum.
Connecting pipesInstalling a mesh on a drum filter
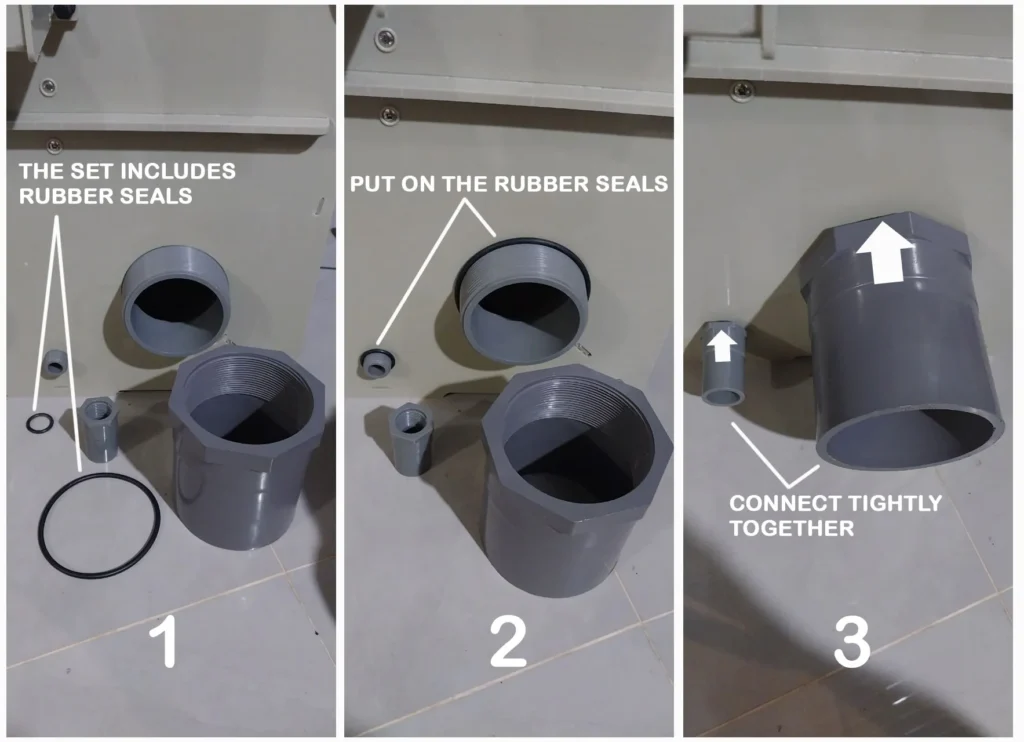
Degrease the connection surfaces Thoroughly clean and degrease the connection area on both the filter and the connector. Ensure that all dirt, oil, and debris are removed to provide a clean surface for proper sealing and secure assembly.
Position the rubber gasket correctly Place the rubber gasket on the outside of the connection point, ensuring it is evenly aligned and not twisted or damaged. Proper positioning of the gasket is essential to prevent leaks and ensure reliable operation.
Tighten the threaded connection Carefully screw the connector into place and tighten the thread securely. Do not overtighten, as excessive force may damage the components or the gasket. Ensure the connection is firm and leak-proof.
The filter does not stop, test and repair
The filter does not stop, test and repair.
System test, steps to repair the system.
If the motor and pump are constantly on and won’t turn off, Test the system using the video. There’s a high probability that the problem is in the float switch.