Installation start
Please connect the pipes to the filter following the illustration below for proper installation.
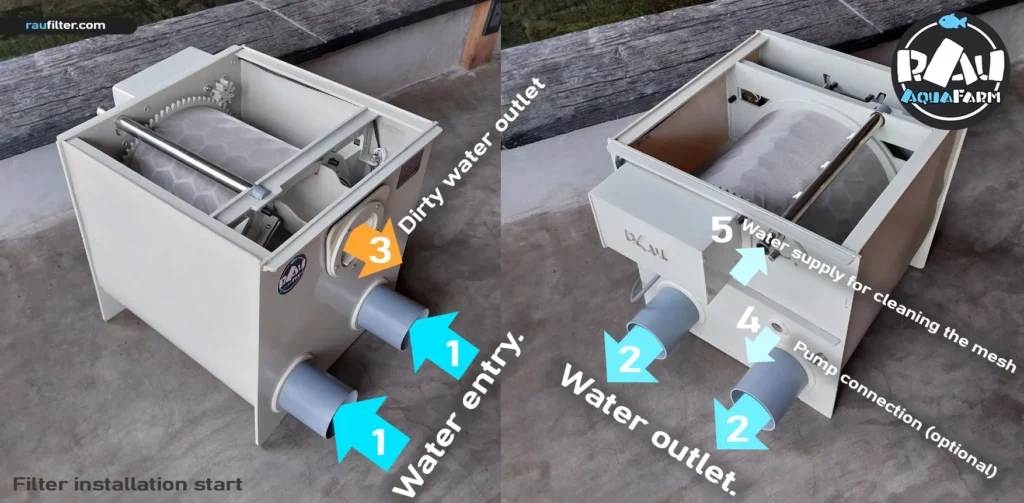
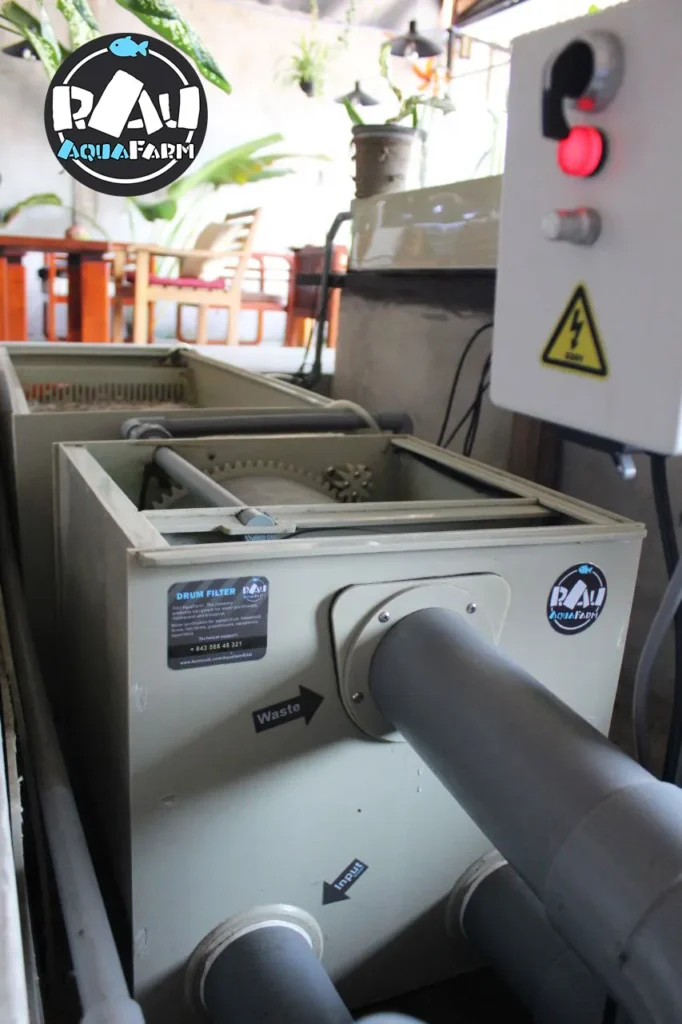
1. Water inlet
2. Output of purified water
3. Dirt that the filter has cleaned.
4. Connection for possible connection of a pump.
5. Connection for supplying pressurized water for cleaning the mesh. Connection options.
– Can connect a high pressure pump (model please contact support)
– You can install a solenoid valve

1. Solenoid Simple, long-lasting use (minimal electricity consumption) Used only if your pipes have sufficient pressure.
2. Pump It creates pressure itself to clean the mesh.
Design options
There are several fundamental options for installing the RAU filtration system. However, you can design your own custom filter system—your imagination is the only limit.
- One Level of the pond
- Below the pond level
- Above the pond level
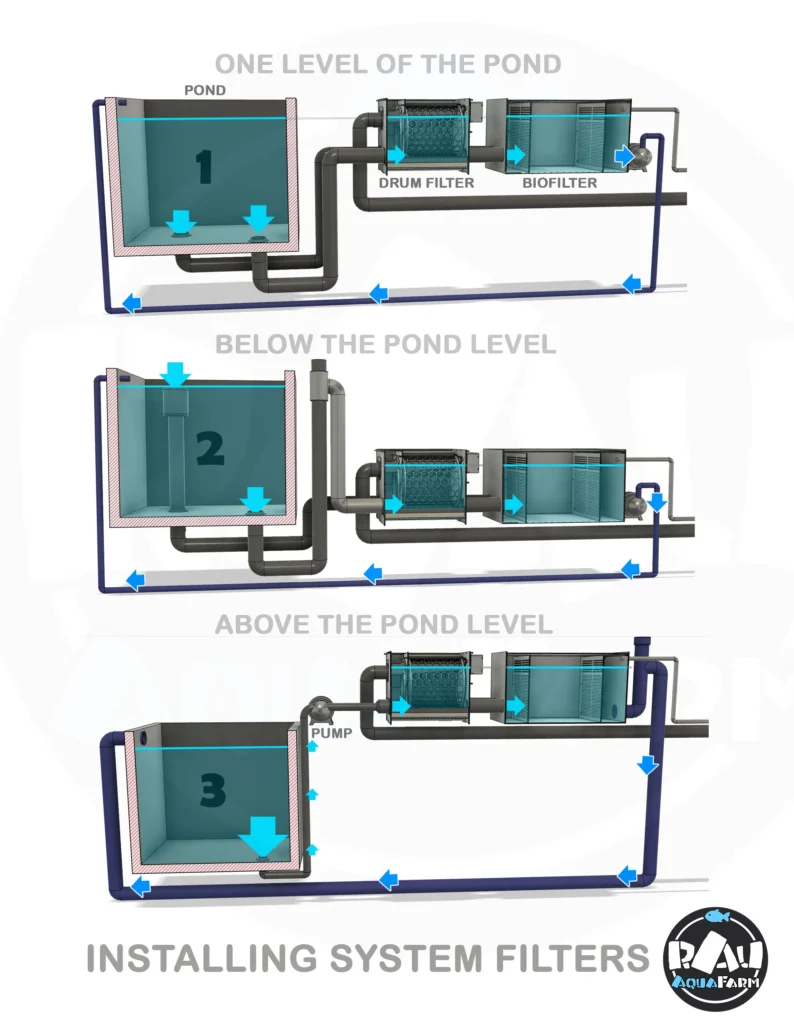
1. One Level of the pond
The water in all tanks is maintained at the same level, including in the pond, the drum filter, and subsequent biological chambers (a slight water drop is possible).
This setup is suitable for various applications: home ponds, pond farms, farms with tanks, pools, aquariums, aquaponics farms, and any environment where aquatic animals are housed.
2. Below the pond level
2. Below the pond level
The water level in the pond is higher than in all other tanks. This setup is suitable for small ponds, home fish farms, and medium to small-sized aquariums.
This system can also be installed in large ponds, farms, and aquariums. However, when power to the pump is turned off, the system will lose a significant amount of water if not planned properly. Nothing will happen to the pud, just a lot of water will be lost that will need to be replenished when the electricity is turned on.
Solutions for Managing Large Volumes of Water:
3. Above the pond level
In this system, a pump lifts water from the pond into a filtration system. While this setup is suitable for various types of systems, it is rarely used in professional large fish farms. The reason is that water containing waste must pass through the pump before entering the filter system, causing a large amount of debris to pass through the pump, which reduces its service life.
Woter Level
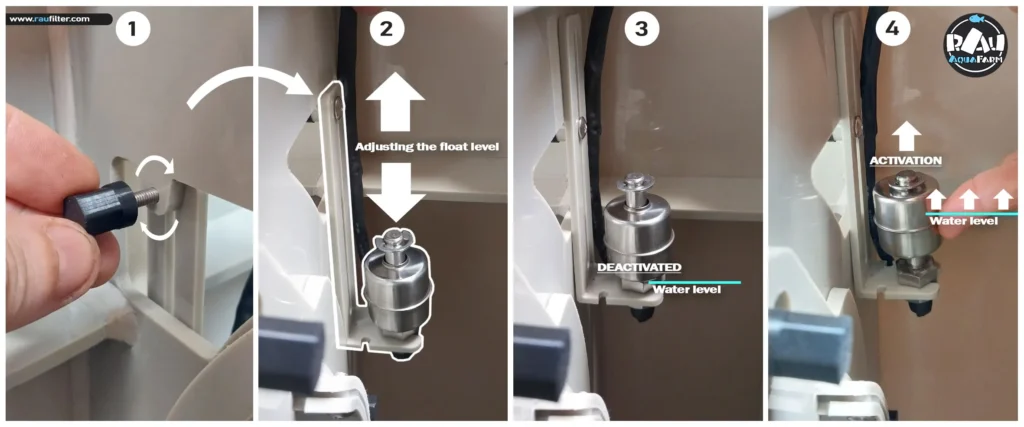
First, set the water level in the drum filter correctly. For maximum efficiency, position the water level 2 cm below the emergency overflow level. Ensure it remains below the emergency overflow holes. These holes allow water to pass through during power outages, preventing overflow from the drum filter.
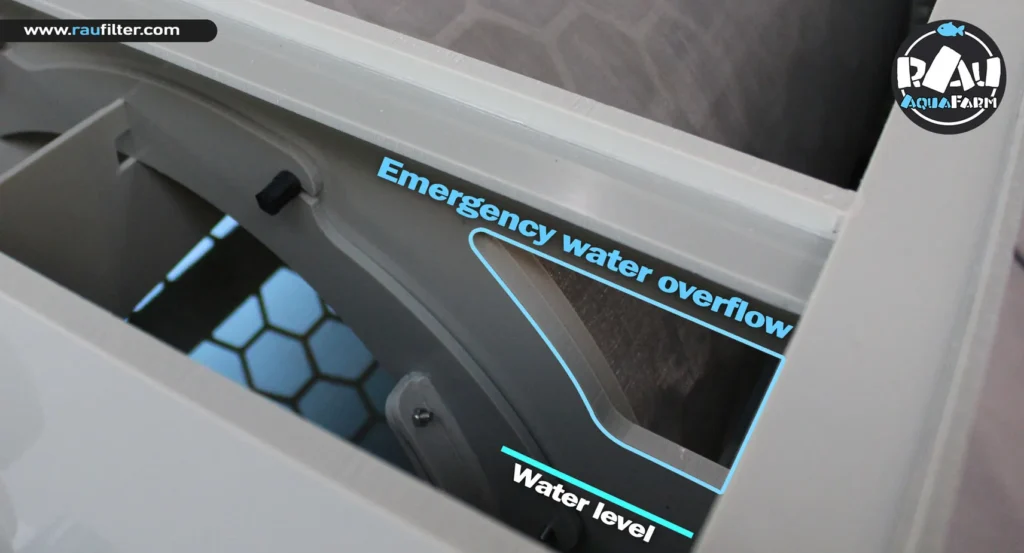
The emergency float switch can be adjusted in height for optimal performance. It can be installed in two versions depending on your system (refer to the next section, “Float Switch,” for more details).
Set your drum filter system to auto-start and run on a timer at specific intervals. Configure the system so that the emergency float switch activates only in emergency situations; it should not continuously turn on the system.
After the drum filter, ensure that all other filters, such as biofilters, UV filters, and shower filters, are installed and functioning properly.
By following these recommendations, your system will operate reliably and efficiently for a long time.
Float switch
2 options for installing a float switch
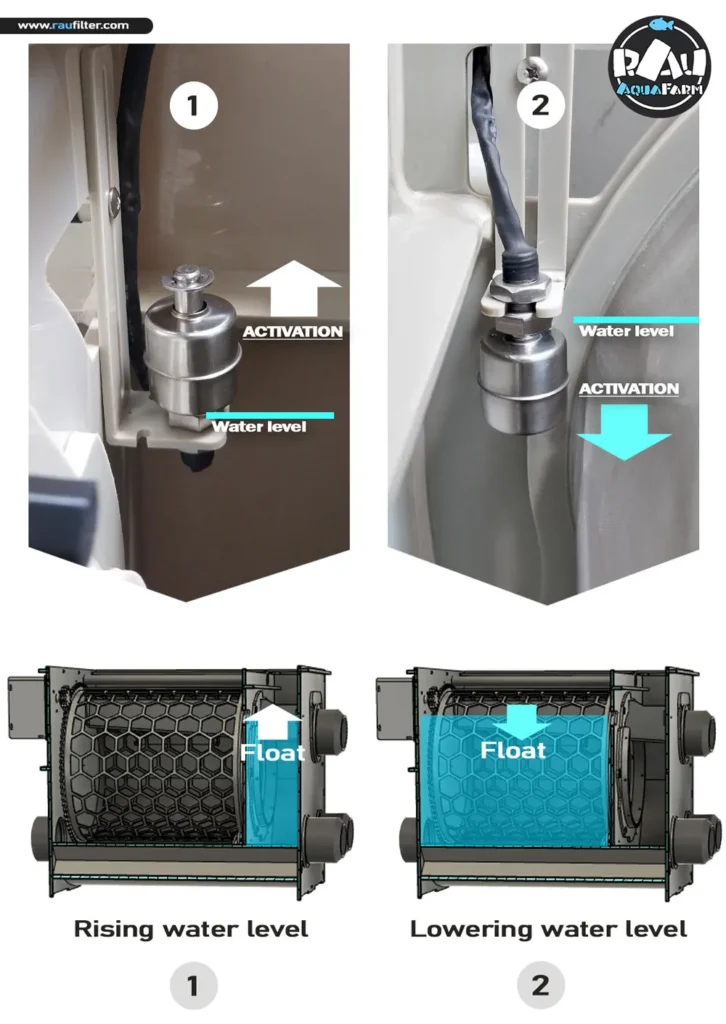
System 1:
used when water is supplied to the drum filter by gravity (with some exceptions). The float switch is located in the first compartment (water underneath), when the mesh becomes dirty, the water rises, activating the float and the entire system.
System 2:
used when water is supplied to the filter using a pump (with some exceptions). The float switch is located in the second compartment and if the mesh is dirty, water does not pass through the mesh and the water level drops, thereby lowering the float and activating the system.
Installation of float for System 1 and 2
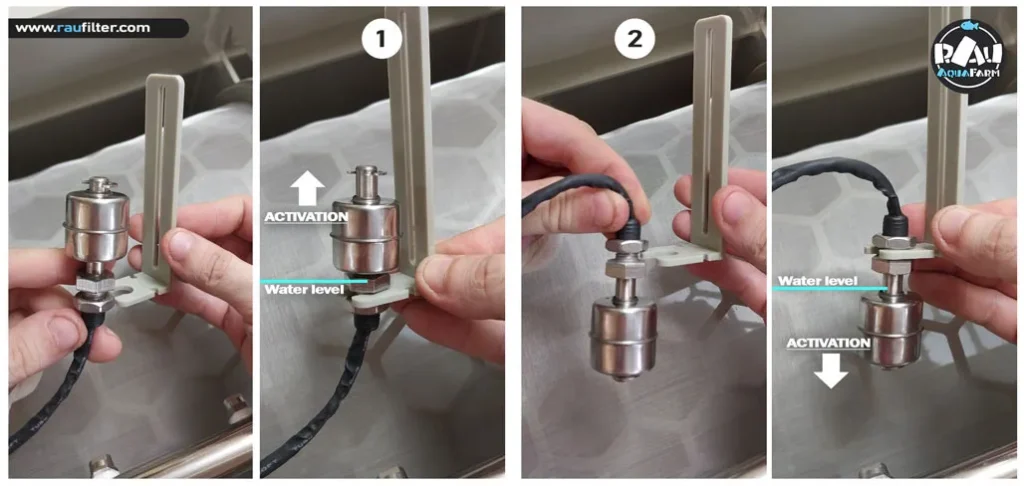
Select the option that suits your system and position the float switch according to the instructions as in the photo.
The first two photos are installation option System 1
The second 2 are installation option System 2
System1:
Water is located below the float switch.
The float switch is activated when the water level rises, raising the float.
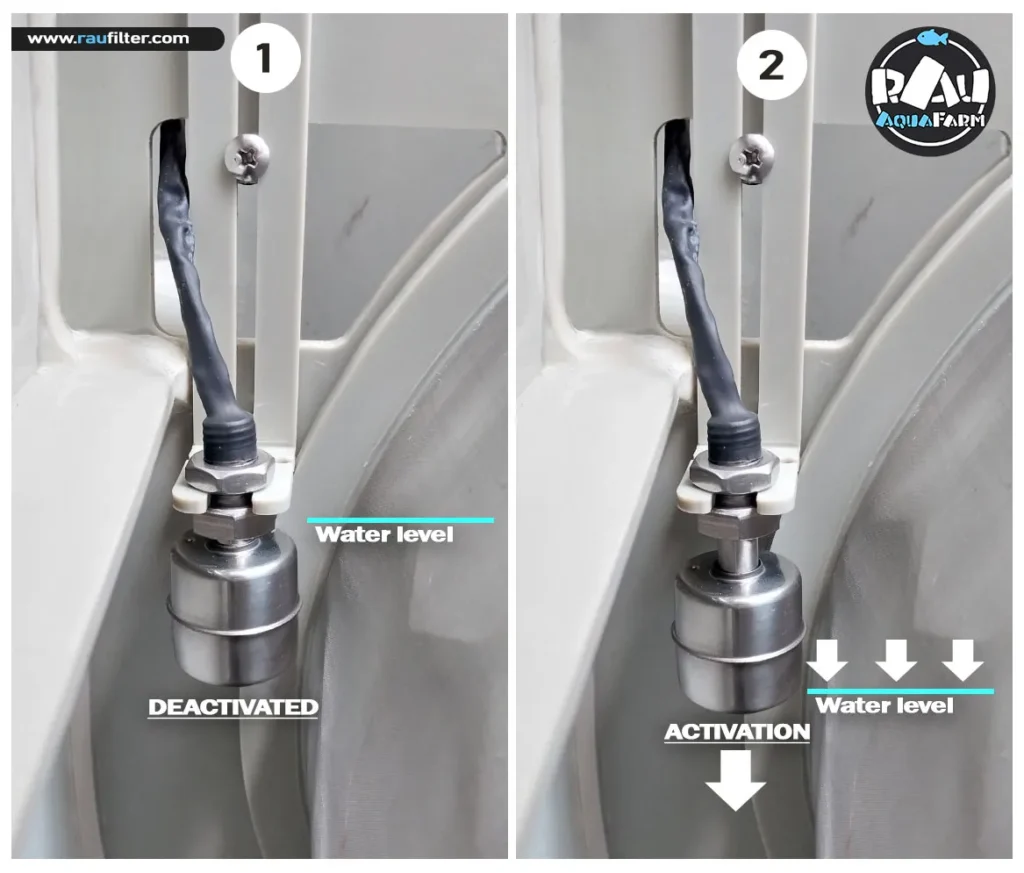
System2:
Water is located above the float switch.
The float switch is activated when the water level drops below the float.
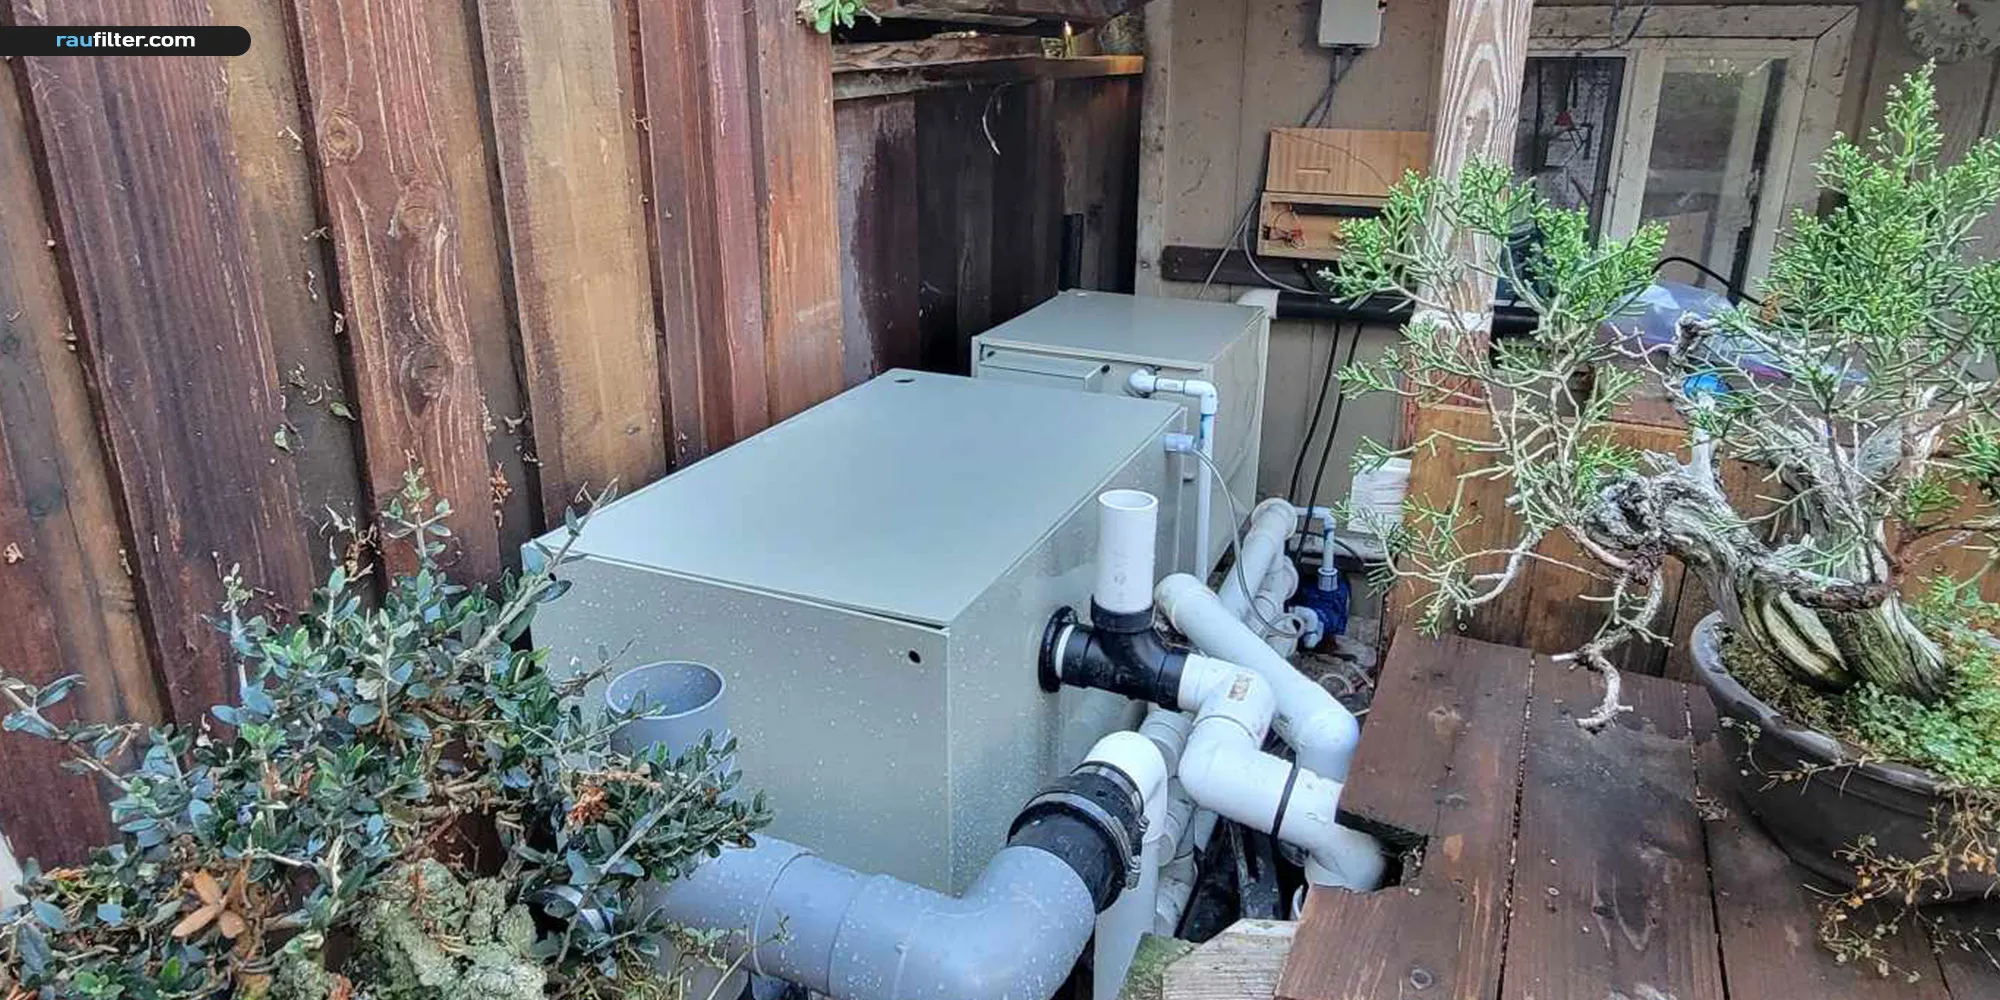
Installation Example
This is one example of installing a filter system, a drum filter with a biofilter for a home pond from the company RAUfilter
Install Filter on a Surface
It is very important that the surface where you install the filter is level and horizontal. None of the corners of the surface should be higher than another. When filled with water, the filter’s plastic will conform to the shape of the surface it is placed on. If the surface is not level, the filter may become skewed and not function correctly. This can affect the filter’s performance and longevity.
For example, it is good to install the filter on a concrete floor, a wooden slab, a hard table, or any hard surface that does not sag and can withstand the weight of the filter filled with water.
Control box
Instruction for Client Use
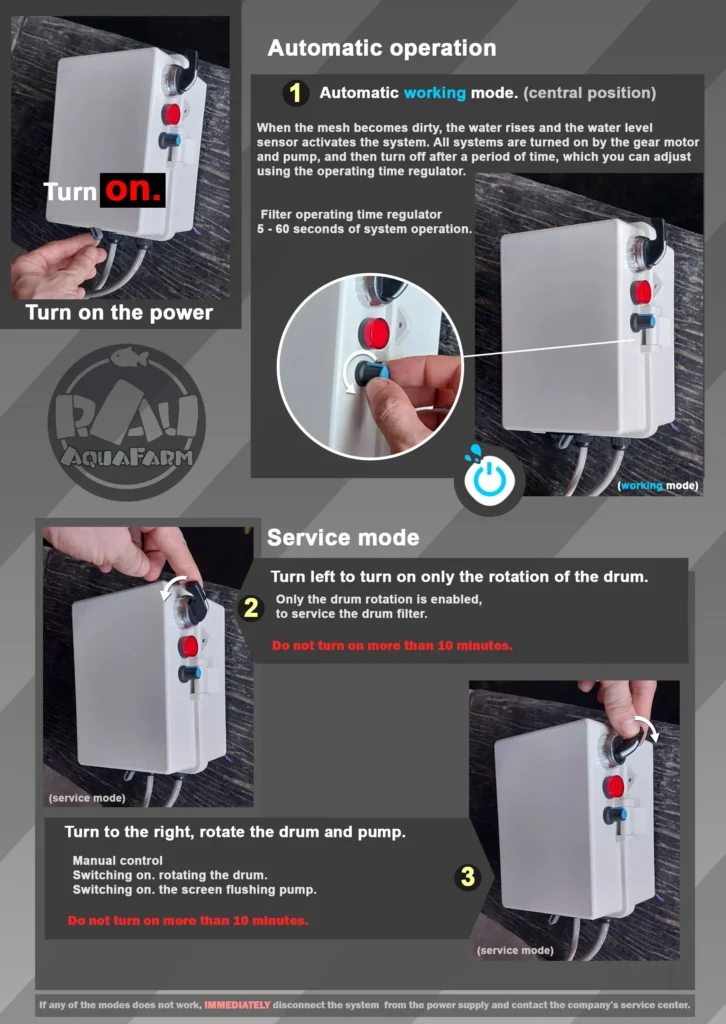
The filter features a cyclic timer that automatically turns the filter on and off. The float switch operates solely as a backup emergency system.
For assistance with setting up the timer, our consultant will send you detailed instructions. Please contact him using the information provided at the bottom of the page.
VERY IMPORTANT: automatic mode should always be the default (centered). Only with your attention turn on modes 2 and 3.
Important Information on Filter Selection:
The amount of fish in your pond and the daily feed quantity directly affect the performance of the drum filter. A higher number of fish and more feed increase the load on the filtration system, which may require more frequent cleaning or a filter with higher capacity.
To choose the most suitable filter for your pond, please consult with our specialists. They will help you determine the optimal model, taking into account all the specific features of your pond and its inhabitants.
Please note: If you do not seek consultation from our specialists, the responsibility for the filter’s performance rests solely with you.
Disclaimer:
While every care has been taken in preparing this document, RAU Filter accepts no liability for any unintentional errors or
inaccuracies in this document. If you have any concerns or questions, please contact us or your dealers for clarification. RAU Filter is not liable for any loss, damages or injuries which occur as a result of not correctly following the directions in this manual.
This document or any portion thereof may not be reproduced or used in any manner whatsoever without the express written
permission of Real Link Company Limited.
If you have questions about installation, operation or any problems with the filter, please contact our consultants, our highly qualified expert will help you.